Wizzie Data Platform (WDP) AMI
Launching the CloudFormation Stack
First step is to launch the stack using provided CloudFormation template. The stack creation process will ask you for some customizable parameters, but the only mandatories are:
- StackName: to identify your stack
- KeyName: SSH Key to access to created EC2 instances. You need the key before deploying the stack. If you don’t have any, check AWS documentation.
- AdminPassword: Admin user password for Wizz-in and Grafana.
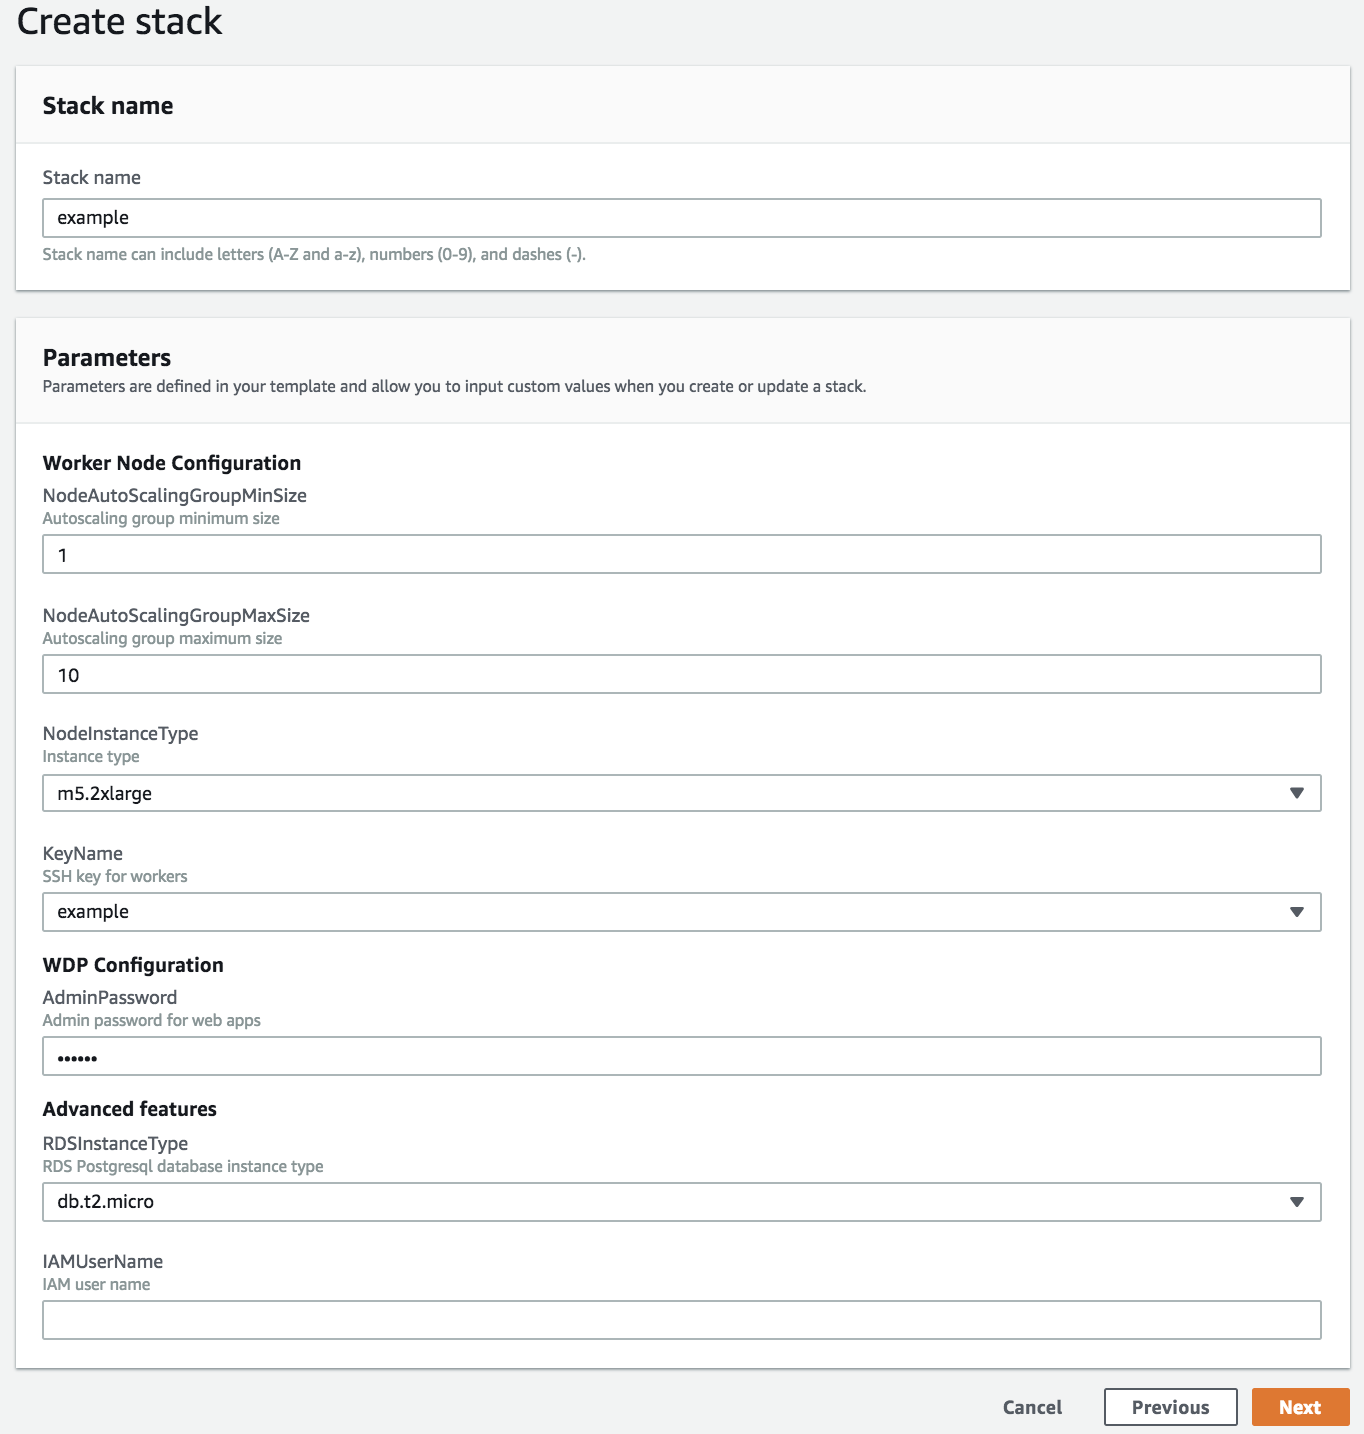
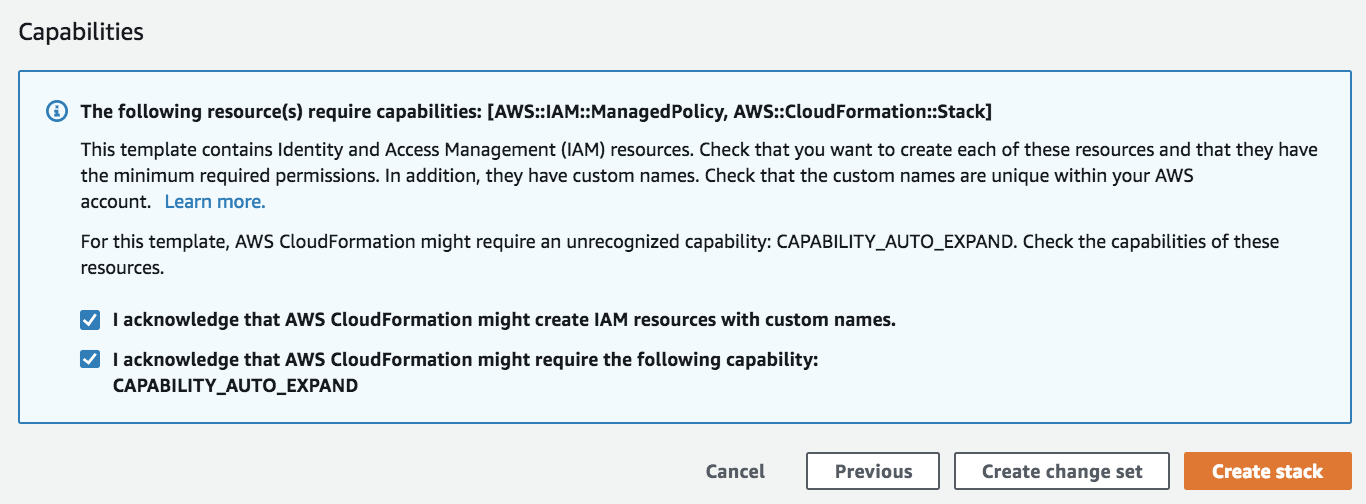
Then, complete next steps until stack creation process begins. Make sure you mark the checkbox about IAM Capabilities.
When stack is created (status CREATED_COMPLETE), WDP is deployed and ready to be used.
Accessing to endpoints
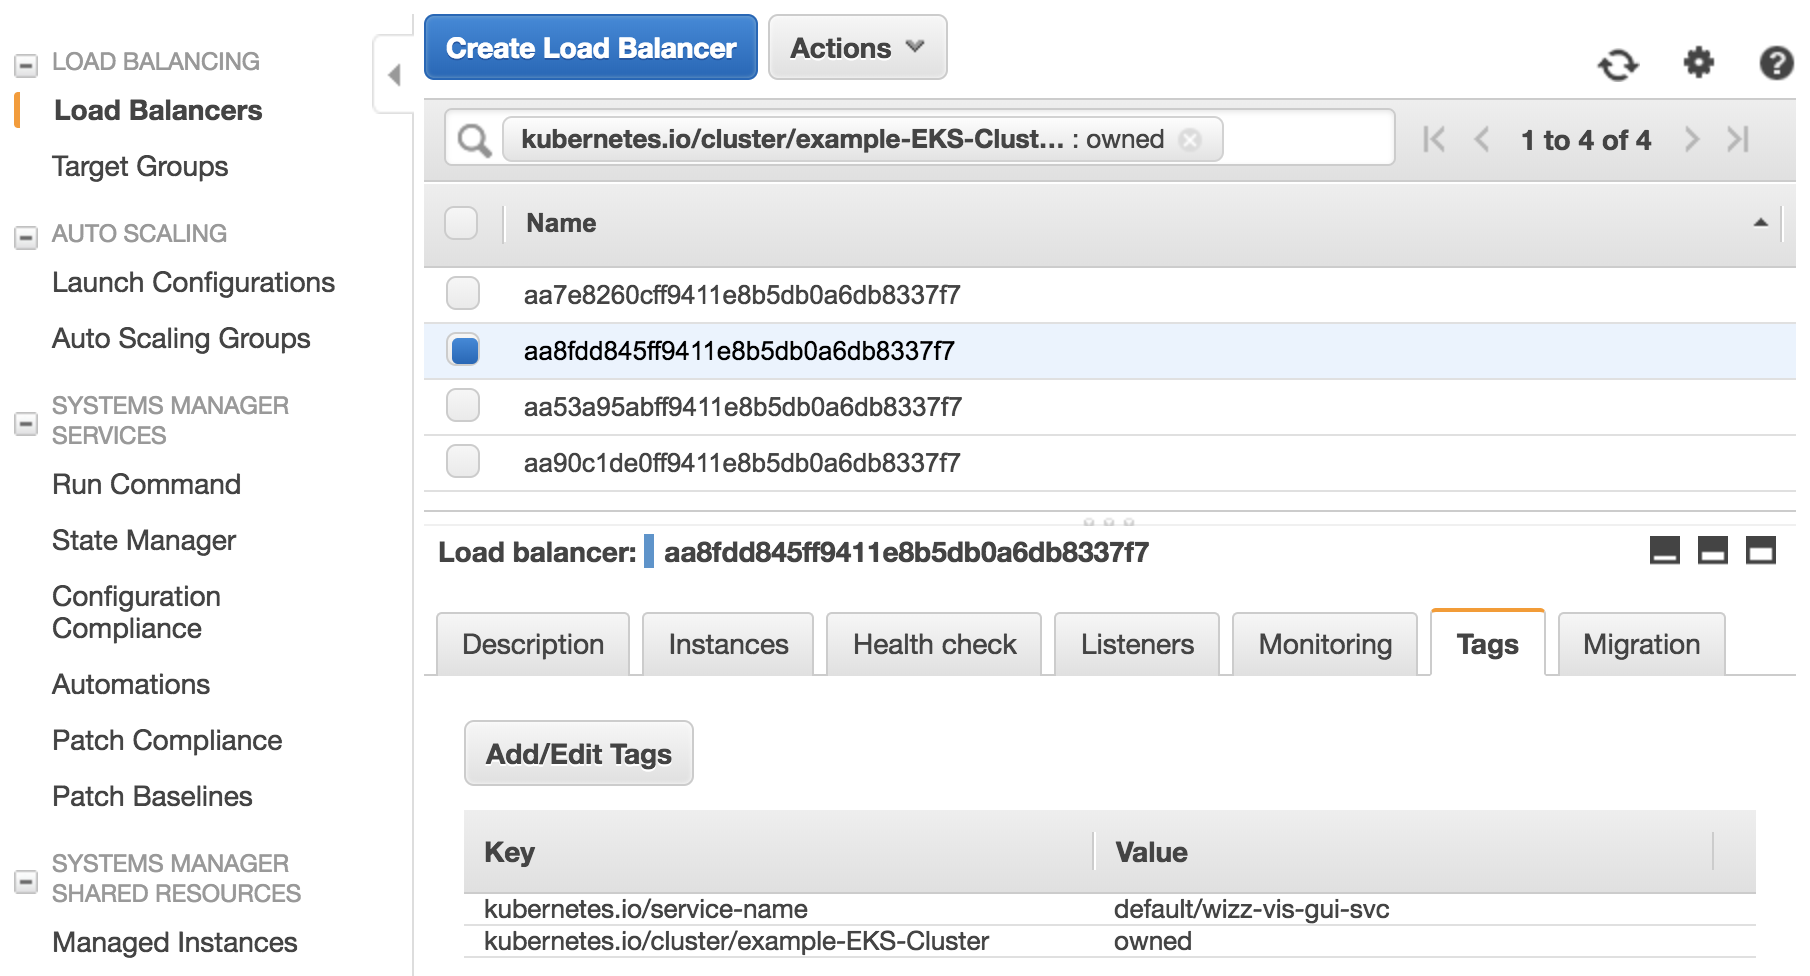
By default, 4 endpoints are created by the stack, to allow access to:
- Wizz-in: to manage users and organizations.
- Wizz-vis: to visualize your data stored in druid.
- Grafana: another way to visualize your data.
- HTTP Data endpoint: to send messages to be processed by WDP. This is the endpoint you have to provide in the Prozzie configuration.
To get these endpoint urls, you can go to LoadBalancer list in the AWS console
and filter by kubernetes.io/cluster/<STACK_NAME>-EKS-Cluster : owned
You can see what load balancer is connected with each service consulting the tag
kubernetes.io/service-name:
- Wizz-in:
default/wizz-in-svc - Wizz-vis:
default/wizz-vis-gui-svc - Grafana:
default/grafana-svc - HTTP Data endpoint:
default/kong-svc
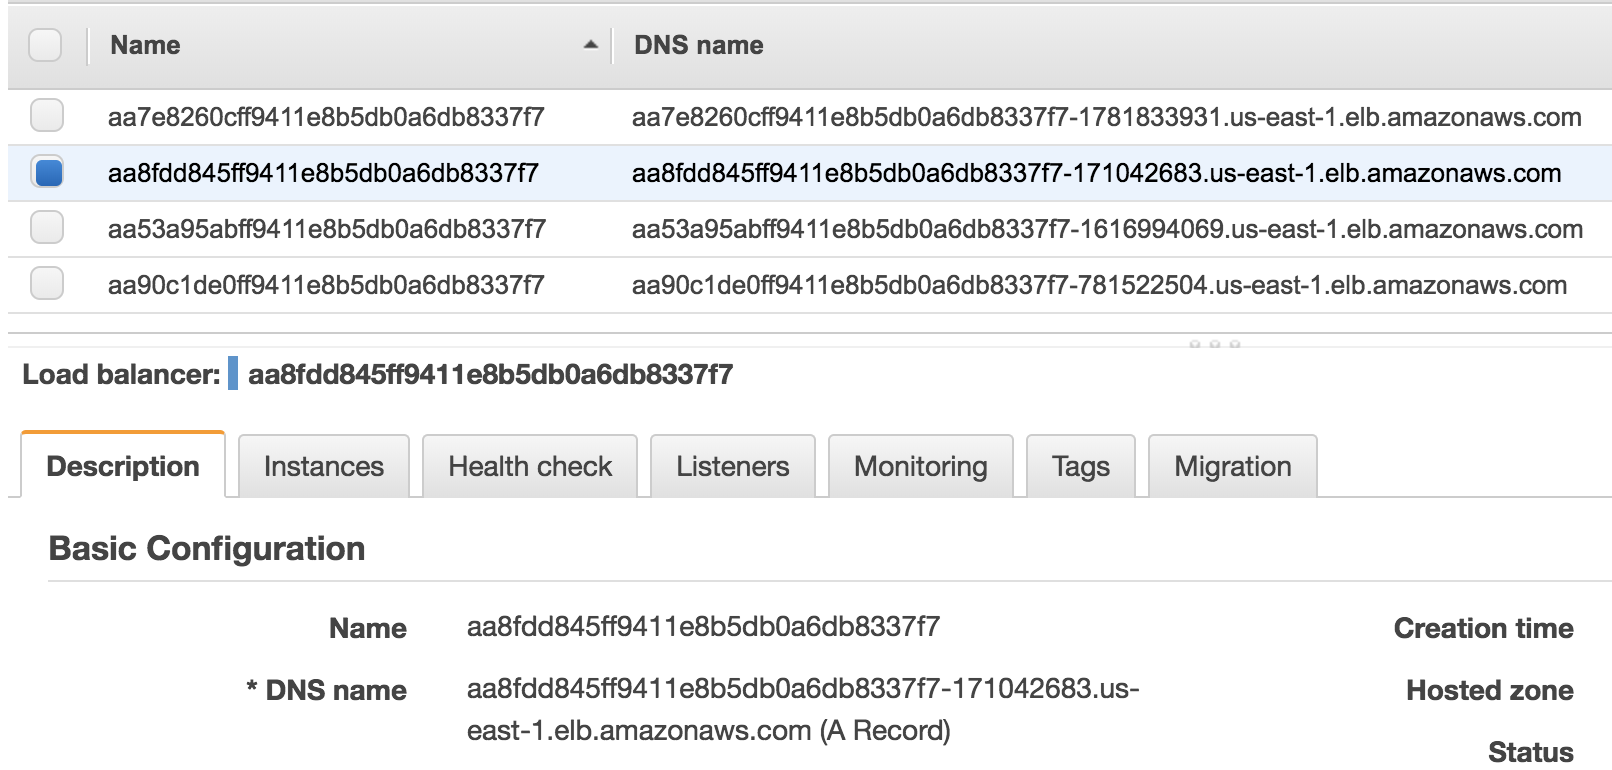
The DNS names published by each Load Balancer is shown in the console too.
Accessing to EC2 instance
By default, SSH access to EC2 instance is blocked by Security Groups. You must open port 22 for your IP (or anywhere) to allow SSH connections and then login using chosen key (KeyName parameter) and ec2-user. For example:
ssh -i example.pem ec2-user@<INSTANCE-IP>
Then you can execute sudo su - to gain root access.
Getting started
To start using WDP, go to Getting Started page.